

Paul had mentioned seeing a cool contraption (I can't remember the name now) on TV a few weeks ago that made it easy to create little round balls of cake, making cake pops super easy to make. Of course, cake pops are all the rage these days, even Starbucks carries some of them. I couldn't justify buying something from an infomercial but a couple of weeks ago this babycakes gadget, the babycakes cake pop maker, went on sale at Canadian Tire for $23.99 (regularly it's $39.99). It promised to create a dozen cake pops in minutes! Minutes!!! I couldn't resist and dragged Paul to three different stores to find one (apparently, they sold out pretty quickly - I guess every wants to make cake pops).
It works on the same principal as common waffle irons and George Foreman grill, so it didn't seem that difficult to use and it even comes with a few basic recipes to get you started. It creates mini cake balls and once you glaze and stick lollipop sticks into them you get cake pops! Easy peasy.
I flipped through the instruction booklet and decided to try making the red velvet cake pops. The recipe was easy to follow and I actually had all the ingredients handy, except for buttermilk (but they included a substitute for that).
The only thing I always forget is how messy red food colouring can be. My kitchen looked like a crime scene by the time I was halfway through preparing the batter. Apparently, me alone in the kitchen can be just as messy as Paul and me in the kitchen together....(shhh, don't tell Paul I admitted to that!)

There was enough batter to make about three and half dozen cake balls and since the cake pop maker makes a dozen balls at time, I had roughly three chances to get it right.
My first batch was, um, a little underwhelming. The instructions kept warning to be careful not to overfill the cake ball well and that you only needed a tablespoon of batter. So I piped in about a tablespoon of batter and ended up with little mushroom caps of cake. Haha. They tasted great, but obviously, wasn't as round as I would have liked.
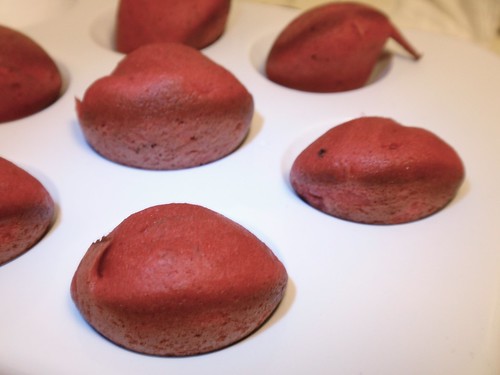
So, for my second batch, I filled the well completely with batter and voila - red velvet cake balls! :)

red velvet cake balls
source: slightly tweaked from babycakes cake pop maker instruction booklet
printer-friendly version
ingredients:
1 1/4 cups all-purpose flour
1/4 teaspoon salt
1 tablespoon cocoa
1/4 cup unsalted butter, softened
3/4 cup sugar
1 egg
1 teaspoon vanilla
1 tablespoon. red food colouring
1/2 cup buttermilk
1/2 teaspoon vinegar
1/2 teaspoon baking soda
optional: 1/2 cup icing sugar
directions:
In a small bowl, combine flour, salt and cocoa. Using a fork, blend the mixture together well and set aside.
Using a mixer, beat butter until creamy. Slowly add sugar and continue beating until light and fluffy. Add egg and vanilla and blend until creamy and smooth.
In a medium bowl, whisk the red food colouring into the buttermilk.
Blend a quarter of the flour mixture, then a third of the buttermilk mixture into the butter mixture, repeat this process until everything is used up (you should begin and end with the flour mixture).
In a small bowl, combine the vinegar and baking soda and allow to fizz. Fold this into the cake batter.
Preheat the babycakes cake pop maker.
Using a piping bag, fill each bottom of the cooking well with batter until almost full.
Bake 4 to 5 minutes or until a toothpick inserted into a cake ball comes out clean. Do not open the cake pop maker until at least 4 minutes have passed, otherwise you may break some of the cake balls in half.
Allow the cake balls to cool completely.
Optional: Fill a small, resealable bag with icing sugar. Drop in a few of the cake balls, seal the bag and then shake to completely coat the cake balls. Repeat until all the cake balls have been coated.

yields: approximately 36 cake balls
Steph! These look amazing! And welcome back to the food blogosphere - so good to have you here!!!
ReplyDelete